 0. 目錄
0. 目錄
 1. 老駱提醒
 2. 問題描述
Minimize Objective Function f(x,y):
f(x,y)=(x2+y2)10−cos(x)cos(y)
Subject to the Constraint Equation g(x,y):
g(x,y)=(x2+y2)≥1.5
Design Variables (Side Constraints):
−2≤x≤2−2≤y≤4
Initial Conditions:
x=2y=2
 3. Executable Wrapper的妙用
由於VisualDOC於內部介面使用Jython,故其內建Python語法僅支援到Python2.x版本,但使用者仍可以使用Executable Wrapper連接本機的Python3.x環境甚至其它Executable File使用。
3.1 Work Flow
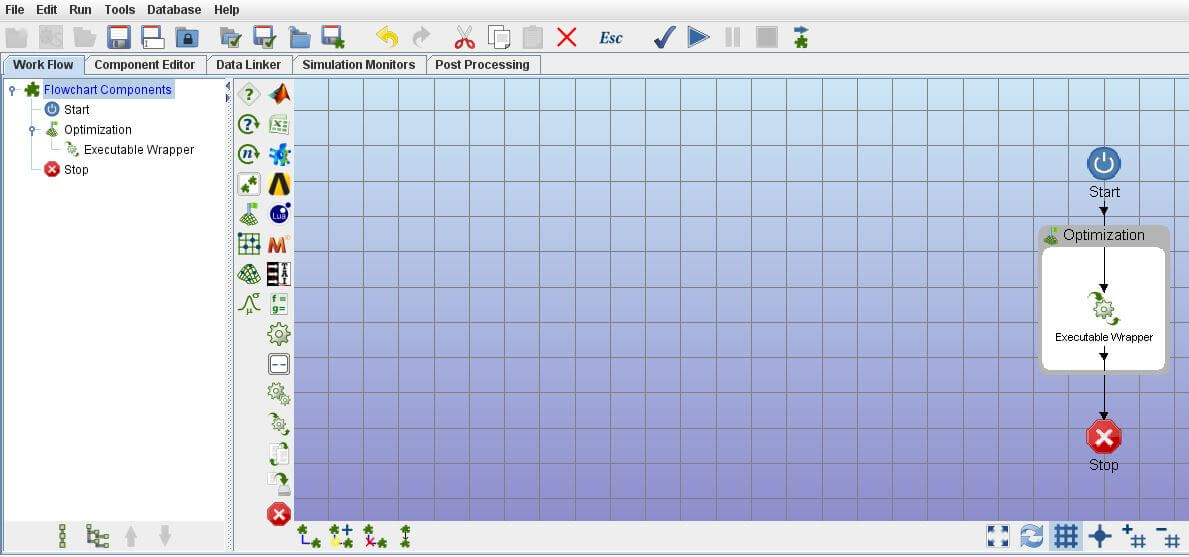
打開Opt Using PythonEquation task,另存一個新的task,命名為Opt Using localPython,並刪除PythonEquation component。
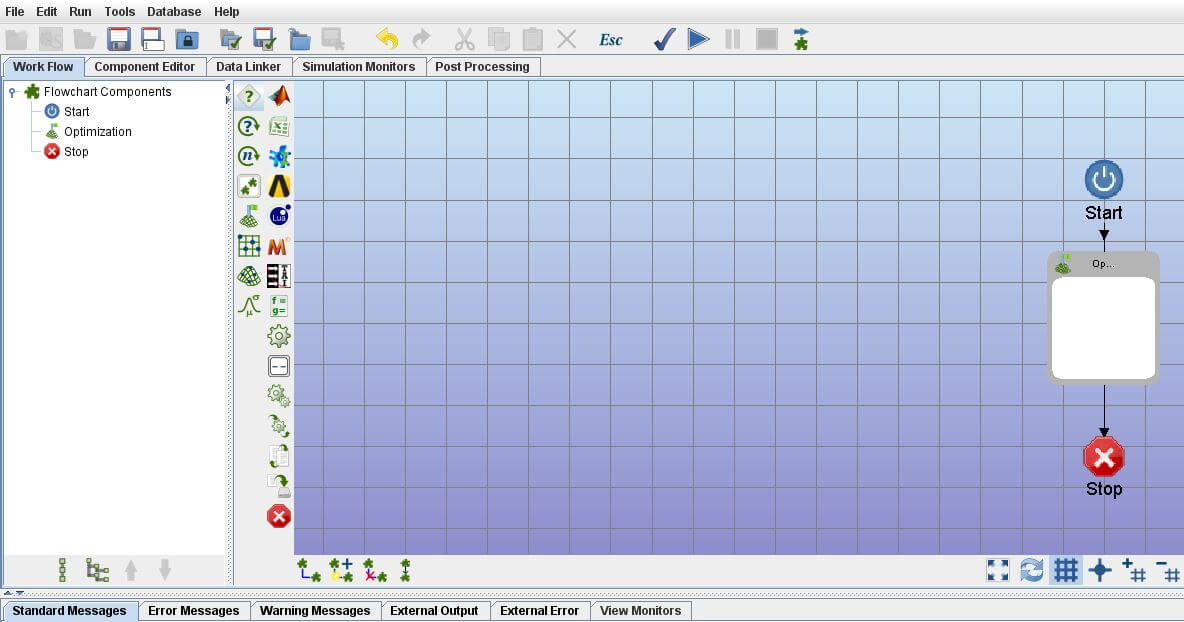
接著至E欄中將Executable Wrapper component拖曳至Optimization component中。
 要注意請選擇
Executable Wrapper component,不是Executable component喔!
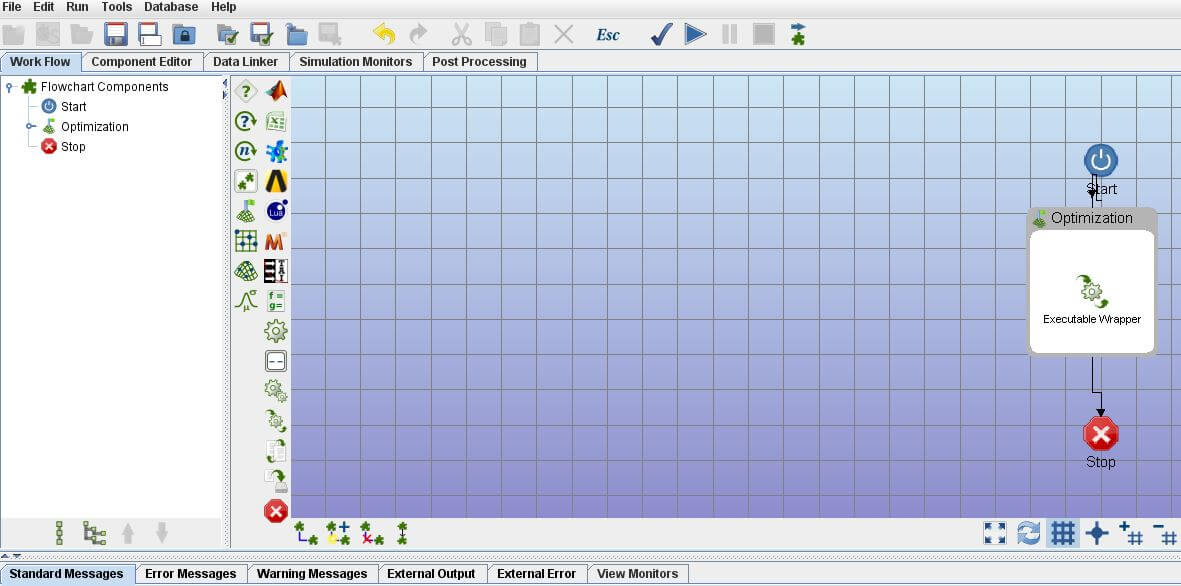
重新連接Work Flow。
3.2 Component Editor內層
建立1個.txt檔案,命名為input.txt,在第1行及第2行都輸入2.0,來代表x及y的Initial Value。
建立1個空的.txt檔案,命名為output.txt。
建立1個.py檔案,命名為Equation.py,輸入以下程式碼。
import math
with open('input.txt') as file:
ipt = [float(line) for line in file]
x, y = ipt
f = (x**2 + y**2) / 10 - math.cos(x) * math.cos(y)
g = x**2 + y**2
with open('output.txt', 'w') as file:
for line in (f, g):
file.write('{:28.16e}'.format(line) + '\n')
使用Executable Wrapper,必須自己處理I/O介面,雖然比較麻煩,但是對於複雜的I/O文件,可以有很好的控制權。此外,由於已經接到了本機的Python環境,所以這表示可以自由import其它模組來運用,像是pandas、numpy、scipy等等,後續可以做相當多的運用。
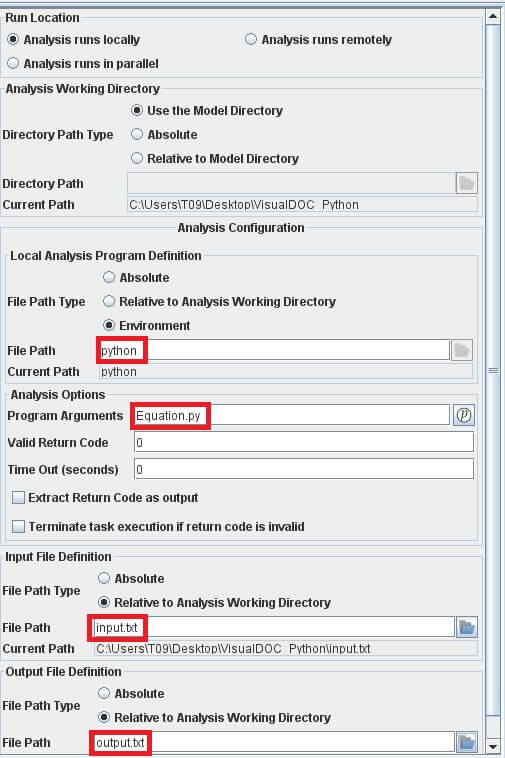
點選C欄 Component Editor內的Executable Wrapper component,於右方欄位進行下列設定:
- 在
Local Analysis Program Definition中選擇Python的執行方法。老駱自己是習慣用環境變數,所以打了Python。此外也可以直接用路徑來指定。舉例來說,例如想用Anaconda下1個名叫VisualDOC的虛擬環境來執行的話,可以將Fie Path Type設為Absolute,並於File Path輸入C:\Users\您的使用者名稱\Anaconda3\envs\VisualDOC\python.exe。
- 在
Analysis options 裡的Program Arguments內輸入Equation.py。
- 在
Input File Definition的File Path選擇input.txt。
- 在
Output File Definition的File Path選擇Output.txt。
輸入完成後,右方的欄位應該會像:
點選左方欄位,進行下列設定:
- 輸入
x、y、f及g。
- 將
x及y的Input/Output設定為input。
- 將
f及g的Input/Output設定為output。
如 VDOC_01_PythonEquation 所述,其實不一定要指定x及y的Initial Value,但如果指定的話,將有助於確認與本機Python環境是否正確設定。事實上,如果不指定此處x及y的Initial Value,VisualDOC還是能正常執行。
輸入完成後,左方的欄位應該會像:

3.3 Data Linker
點選C欄中的Data Linker,使用Automatically add data to the selected model來自動連接。
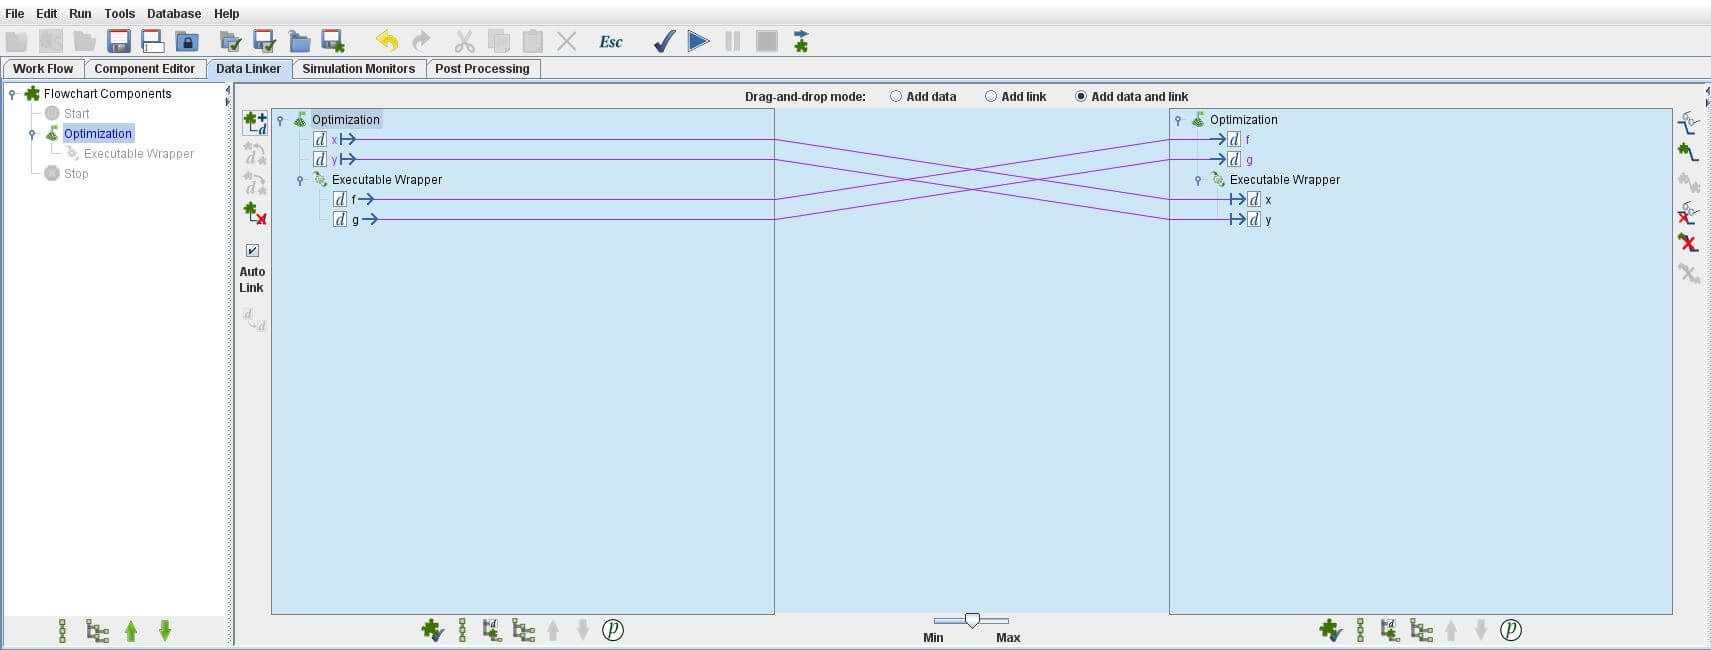
接下來點選C欄中的component editor外層的Optimization component,變數已經新增好了。
3.4 Component Editor內層
點選C欄 Component Editor內的Optimization component,進行下列設定:
- 設定
x的Lower Bound為-2及Upper Bound為2。
- 設定
y的Lower Bound為-2及Upper Bound為4。
- 勾選
f為Objective、不勾選其為Constraint,並確定其Goal維持預設的Minimize。
- 勾選
g為Constraint,並設定其Lower Bound為1.5。

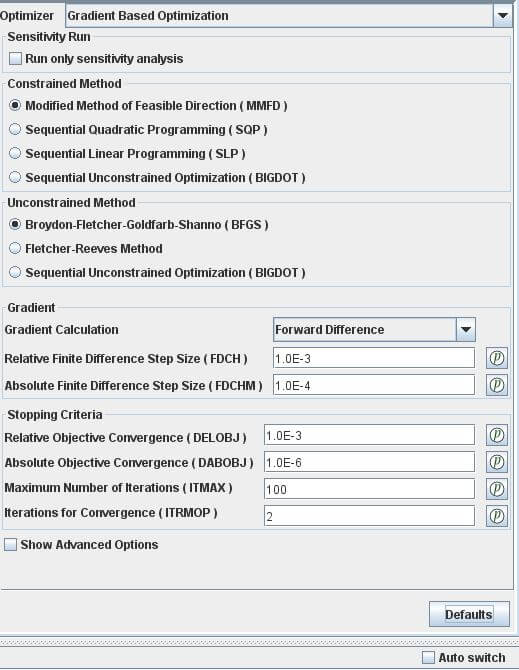
右邊的演算法部份,維持預設。
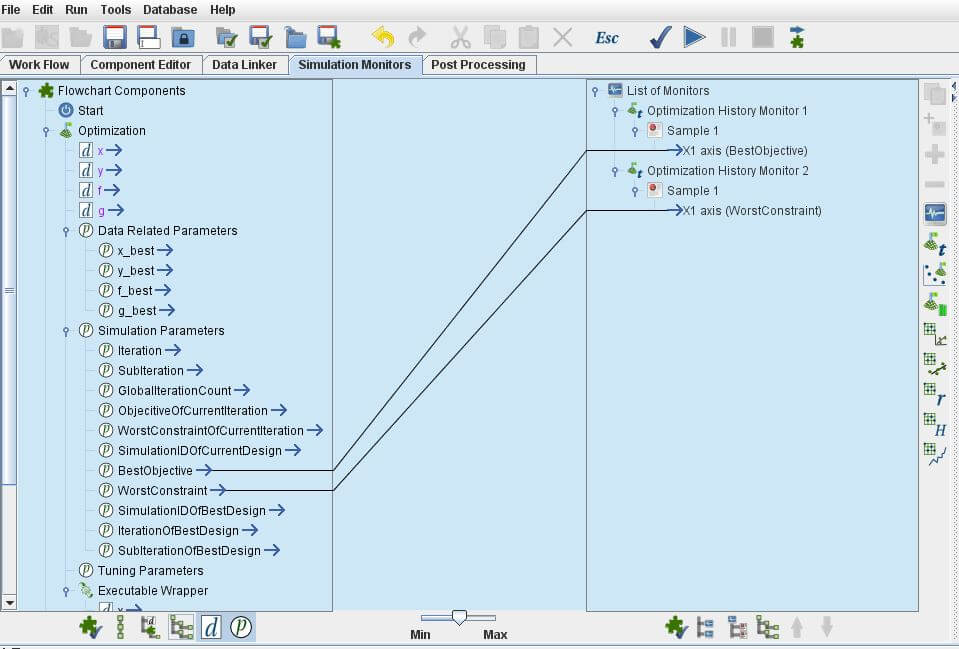
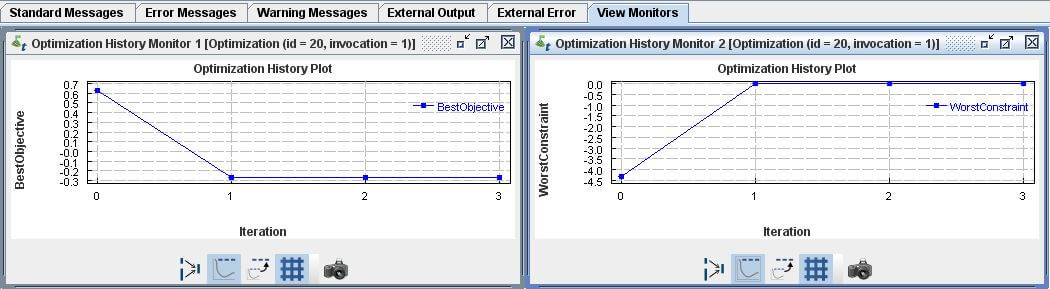
3.5 Simulation Monitors
選擇最常用的BestObjetive及WrostConstraint來觀察。
3.6 Post Processing
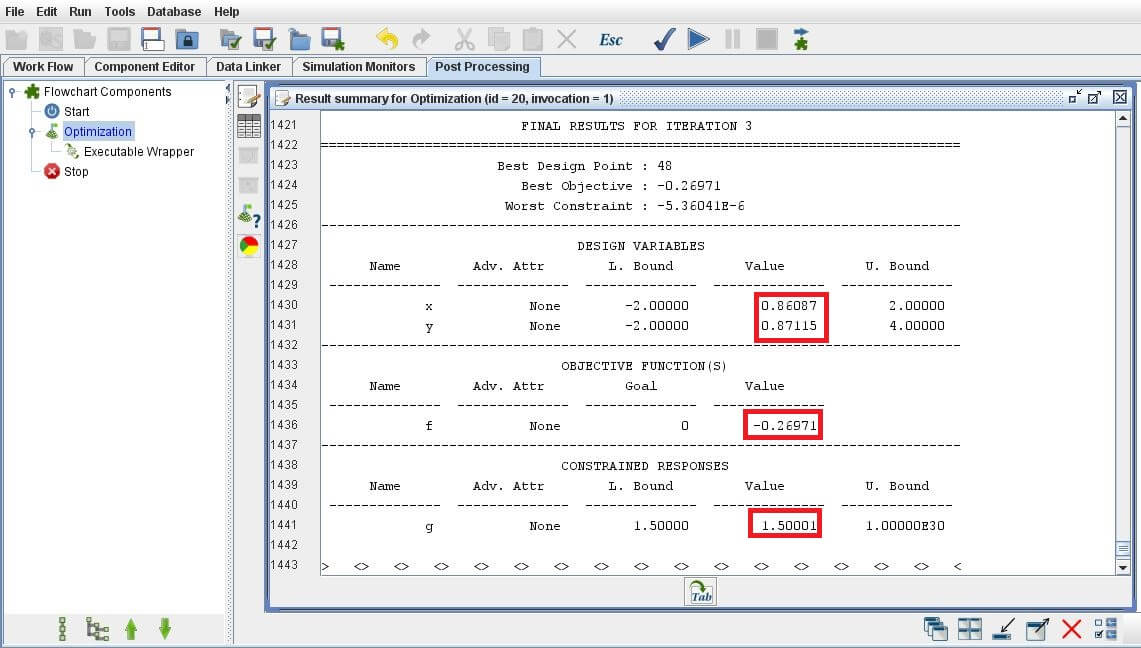
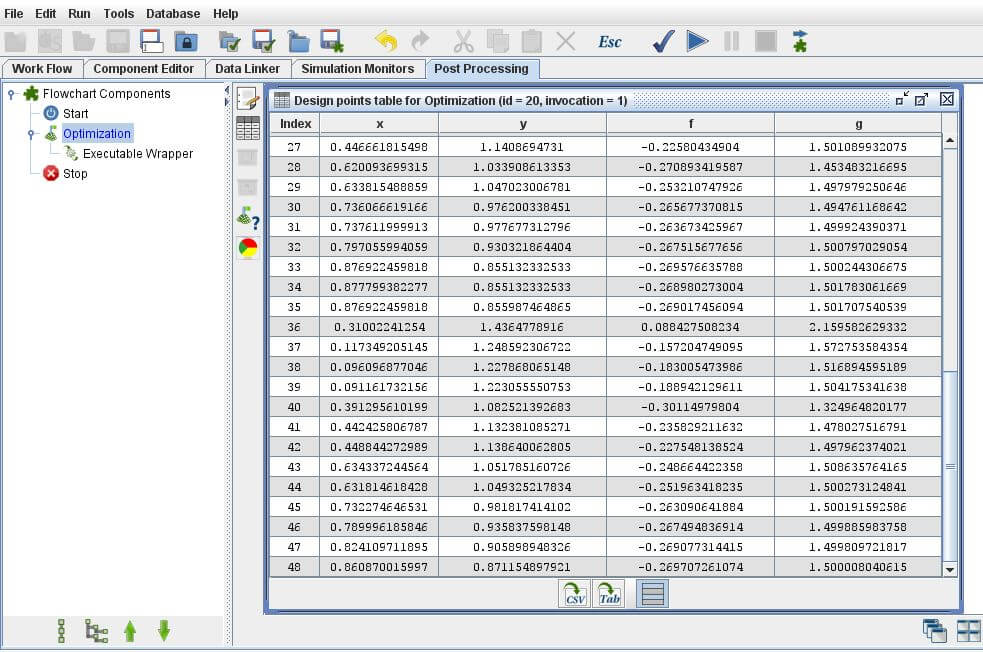
()內為PythonEquation被呼叫次數 |
x |
y |
f |
g |
Opt Using PythonEquation(48) |
0.86087 |
0.87115 |
-0.26971 |
1.50000 |
Opt Using DOE(9) |
2.00000 |
0.29777 |
-0.07096 |
4.08891 |
Opt Using DOE(Verified by PythonEquation)(40) |
2.00000 |
0.29777 |
-0.07096 |
4.08891 |
RSA Using DOE(33) |
0.86787 |
0.86306 |
-0.26985 |
1.49966 |
Opt Using localPython(48) |
0.86087 |
0.87115 |
-0.26971 |
1.50001 |
可以看出來,求解結果與Opt Using PythonEquation一致。
 4. 聯絡老駱
如果您或貴單位:
- 有導入
VR&D產品的意願,但是有報價、採購及發票等問題。
- 有教育訓練或顧問需求。
- 有些建言指教。
- 想交個朋友。
歡迎透過  camel@caeml.ai 聯絡老駱。
VisualDOC內的Executable Wrapper連接您本機的Python環境。Minimizef(x,y) :
f(x,y)=(x2+y2)10−cos(x)cos(y)
Objective FunctionSubject to theg(x,y) :
g(x,y)=(x2+y2)≥1.5
Constraint EquationDesign Variables (Side Constraints):Initial Conditions:由於
VisualDOC於內部介面使用Jython,故其內建Python語法僅支援到Python2.x版本,但使用者仍可以使用Executable Wrapper連接本機的Python3.x環境甚至其它Executable File使用。3.1 Work Flow
打開
Opt Using PythonEquationtask,另存一個新的task,命名為Opt Using localPython,並刪除PythonEquationcomponent。接著至
E欄中將Executable Wrappercomponent拖曳至Optimizationcomponent中。Executable Wrappercomponent,不是Executablecomponent喔!重新連接
Work Flow。3.2 Component Editor內層
建立
1個.txt檔案,命名為input.txt,在第1行及第2行都輸入2.0,來代表x及y的Initial Value。建立
1個空的.txt檔案,命名為output.txt。建立
1個.py檔案,命名為Equation.py,輸入以下程式碼。Executable Wrapper,必須自己處理I/O介面,雖然比較麻煩,但是對於複雜的I/O文件,可以有很好的控制權。此外,由於已經接到了本機的Python環境,所以這表示可以自由import其它模組來運用,像是pandas、numpy、scipy等等,後續可以做相當多的運用。點選
C欄Component Editor內的Executable Wrappercomponent,於右方欄位進行下列設定:Local Analysis Program Definition中選擇Python的執行方法。老駱自己是習慣用環境變數,所以打了Python。此外也可以直接用路徑來指定。舉例來說,例如想用Anaconda下1個名叫VisualDOC的虛擬環境來執行的話,可以將Fie Path Type設為Absolute,並於File Path輸入C:\Users\您的使用者名稱\Anaconda3\envs\VisualDOC\python.exe。Analysis options裡的Program Arguments內輸入Equation.py。Input File Definition的File Path選擇input.txt。Output File Definition的File Path選擇Output.txt。輸入完成後,右方的欄位應該會像:

點選左方欄位,進行下列設定:
x、y、f及g。x及y的Input/Output設定為input。f及g的Input/Output設定為output。如 VDOC_01_PythonEquation 所述,其實不一定要指定
x及y的Initial Value,但如果指定的話,將有助於確認與本機Python環境是否正確設定。事實上,如果不指定此處x及y的Initial Value,VisualDOC還是能正常執行。輸入完成後,左方的欄位應該會像:

3.3 Data Linker
點選
C欄中的Data Linker,使用Automatically add data to the selected model來自動連接。接下來點選
C欄中的component editor外層的Optimizationcomponent,變數已經新增好了。3.4 Component Editor內層
點選
C欄Component Editor內的Optimizationcomponent,進行下列設定:x的Lower Bound為-2及Upper Bound為2。y的Lower Bound為-2及Upper Bound為4。f為Objective、不勾選其為Constraint,並確定其Goal維持預設的Minimize。g為Constraint,並設定其Lower Bound為1.5。右邊的演算法部份,維持預設。
3.5 Simulation Monitors
選擇最常用的
BestObjetive及WrostConstraint來觀察。3.6 Post Processing
PythonEquation被呼叫次數xyfgOpt Using PythonEquation(48)Opt Using DOE(9)Opt Using DOE(Verified by PythonEquation)(40)RSA Using DOE(33)Opt Using localPython(48)可以看出來,求解結果與
Opt Using PythonEquation一致。如果您或貴單位:
VR&D產品的意願,但是有報價、採購及發票等問題。歡迎透過