 0. 目錄
0. 目錄
 1. 老駱提醒
 2. 問題描述
Minimize Objective Function f(x,y):
f(x,y)=(x2+y2)10−cos(x)cos(y)
Subject to the Constraint Equation g(x,y):
g(x,y)=(x2+y2)≥1.5
Design Variables (Side Constraints):
−2≤x≤2−2≤y≤4
Initial Conditions:
x=2y=2
 3. VisualDOC操作細節
3.1 Work Flow
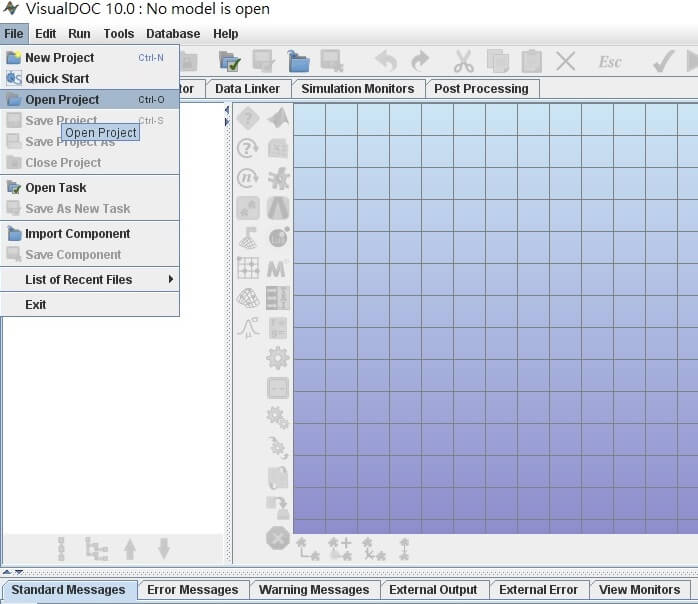
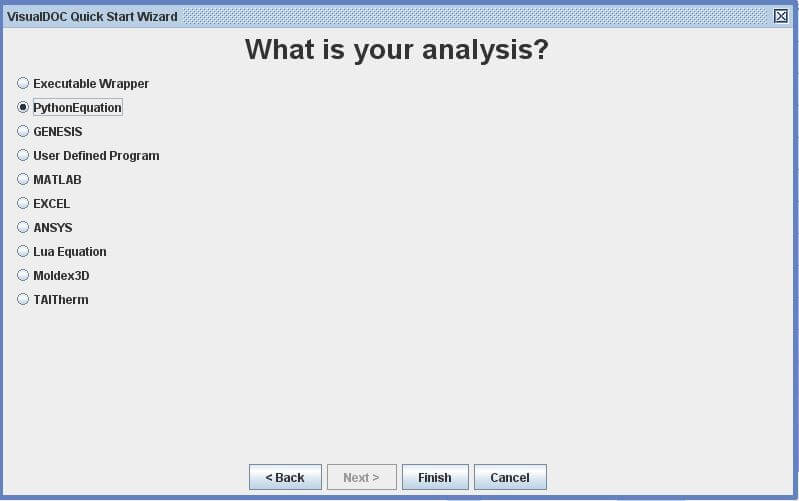
使用Quick Start->Direct Optimization->PythonEquation,快速搭建此問題的Work Flow,並將此task命名為Opt Using PythonEquation。

3.2 Component Editor
3.2.1 Component Editor內層
點選C欄 Component Editor內的PythonEquation,輸入x、y、f及g。輸入順序並不影響求解,但建議照著Design variable->Objective Function->Constraint Equation的順序來輸入,會比較直觀一點。
其中x 及y為此問題的Design Variable,將其Input/Output設定為Input。嚴格來說,在這個問題中,並不需要指定x及y的Initial Value(但如果輸入的話,將有助於確認PythonEquation的設定是否正確,詳參下文)。因為對於VisualDOC而言,它所看到要求解的問題是定義於Component Editor外層。Component Editor內層只是一個讓我們能與VisualDOC溝通的媒介,此處選擇內建的PythonEquation。f 及g則為此問題的Objective Function及Constraint Equation,將其Input/Output設定為Output。

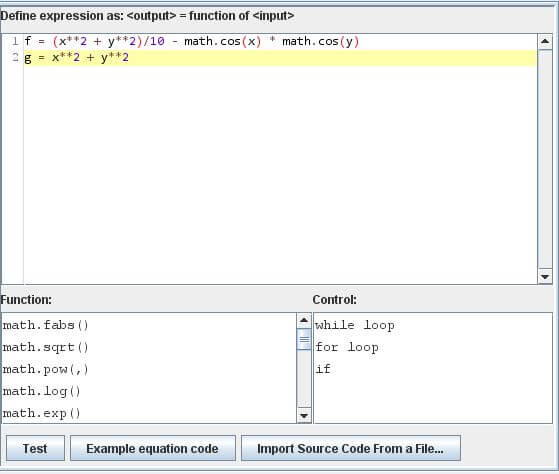
在右邊的程式欄位利用Python2.x的語法輸入f及g。輸入完畢後,如果有給定Initial Value的話,可以按右下方的Test按鈕來確認x、y、f及g 4項的值,以此確認PythonEquation的設定是否正確。
3.2.2 Component Editor外層
點選Component Editor內的Optimization,一樣將x 及y設為Input,f 及g設為Output。接著將x及y設為Variable,f設為Objective,g設為Constraint,並依照問題設定各自的Lower Bound、Initial Value及Upper Bound。當設定Objective時,VisualDOC應該會自動將Goal設定為Minimize。當問題不是最小化的話,要注意須更改設定。

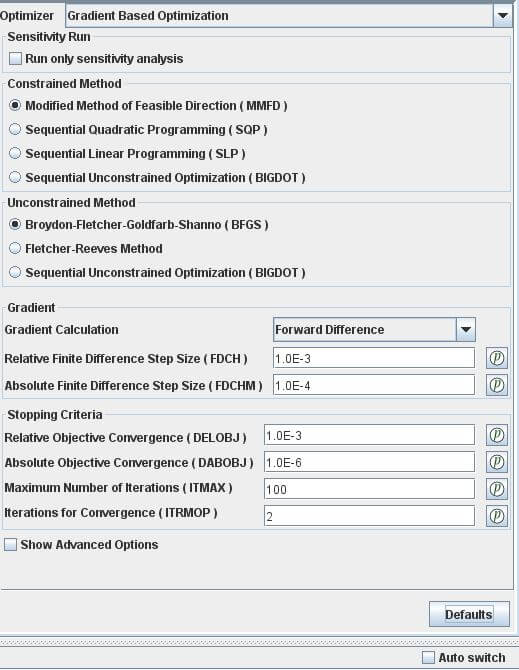
右邊的演算法部份,維持預設。
3.3 Data Linker
本例中,Component Editor內層及Component Editor外層的各個變數皆相同,故可以利用左側的Automatically add data to the selected model來自動連接。

3.4 Simulation Monitors
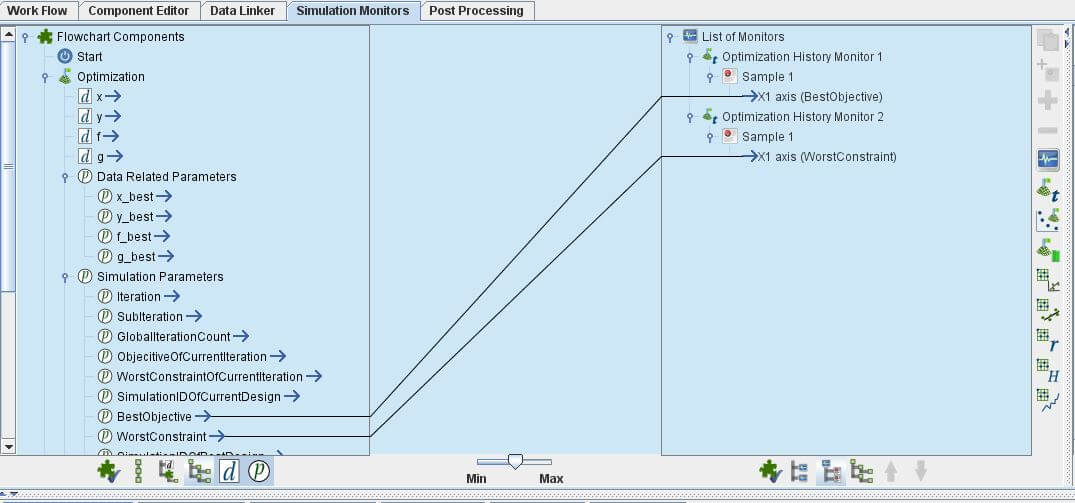
選擇最常用的BestObjetive及WrostConstraint來觀察。
3.5 Post Processing

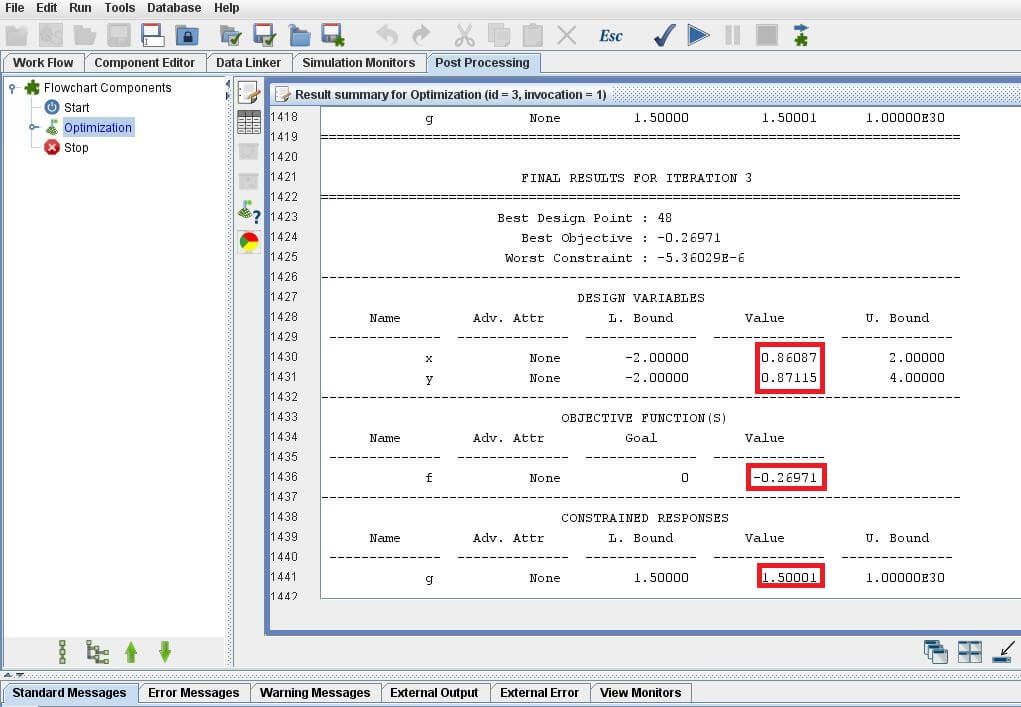

()內為PythonEquation被呼叫次數 |
x |
y |
f |
g |
Opt Using PythonEquation(48) |
0.86087 |
0.87115 |
-0.26971 |
1.50000 |
 4. 聯絡老駱
如果您或貴單位:
- 有導入
VR&D產品的意願,但是有報價、採購及發票等問題。
- 有教育訓練或顧問需求。
- 有些建言指教。
- 想交個朋友。
歡迎透過  camel@caeml.ai 聯絡老駱。
VisualDOC的朋友,建議先參考 VDOC_00_Introduction,裡面有一些VisualDOC的基本介紹、操作技巧及注意事項。VR&D於Getting Started Examples Manual第二章提供的範例做為說明。Minimize Objective FunctionSubject to the Constraint EquationDesign Variables (Side Constraints):Initial Conditions:3.1 Work Flow
使用
Quick Start->Direct Optimization->PythonEquation,快速搭建此問題的Work Flow,並將此task命名為Opt Using PythonEquation。3.2 Component Editor
3.2.1 Component Editor內層
點選
C欄Component Editor內的PythonEquation,輸入x、y、f及g。輸入順序並不影響求解,但建議照著Design variable->Objective Function->Constraint Equation的順序來輸入,會比較直觀一點。其中
x及y為此問題的Design Variable,將其Input/Output設定為Input。嚴格來說,在這個問題中,並不需要指定x及y的Initial Value(但如果輸入的話,將有助於確認PythonEquation的設定是否正確,詳參下文)。因為對於VisualDOC而言,它所看到要求解的問題是定義於Component Editor外層。Component Editor內層只是一個讓我們能與VisualDOC溝通的媒介,此處選擇內建的PythonEquation。f及g則為此問題的Objective Function及Constraint Equation,將其Input/Output設定為Output。在右邊的程式欄位利用
Python2.x的語法輸入f及g。輸入完畢後,如果有給定Initial Value的話,可以按右下方的Test按鈕來確認x、y、f及g4項的值,以此確認PythonEquation的設定是否正確。3.2.2 Component Editor外層
點選
Component Editor內的Optimization,一樣將x及y設為Input,f及g設為Output。接著將x及y設為Variable,f設為Objective,g設為Constraint,並依照問題設定各自的Lower Bound、Initial Value及Upper Bound。當設定Objective時,VisualDOC應該會自動將Goal設定為Minimize。當問題不是最小化的話,要注意須更改設定。右邊的演算法部份,維持預設。
3.3 Data Linker
本例中,
Component Editor內層及Component Editor外層的各個變數皆相同,故可以利用左側的Automatically add data to the selected model來自動連接。3.4 Simulation Monitors
選擇最常用的
BestObjetive及WrostConstraint來觀察。3.5 Post Processing
PythonEquation被呼叫次數xyfgOpt Using PythonEquation(48)如果您或貴單位:
VR&D產品的意願,但是有報價、採購及發票等問題。歡迎透過